BLOG TITLE photo dotFWF_zpsbc04b97d.pngBLOG TITLE photo dotFWF_zpsbc04b97d.pngBLOG TITLE photo dotFWF_zpsbc04b97d.pngBLOG TITLE photo dotFWF_zpsbc04b97d.pngBLOG TITLE
Showing posts with label wreath. Show all posts

Tuesday, February 3, 2015

Valentine's Day Prep & Donut Cookies

 
My mind is seriously blown that it's already February 3rd. Weren't we just ringing in the New Year?
Not complaining though, because this is one of my favorite months. Sure, it's dreary and cold and yucky outside for the most part. But it's also the month that I actually get to decorate with and enjoy the color PINK! Living with two boys, that doesn't happen too often. I embrace it while I can. :)
 
 
I didn't do much decorating inside this year, but I did draw on a chalkboard "wreath" for our front door (chalkboard tutorial somewhere in the archives!).
 
Pretty sure I already posted this picture, but in case you missed it, these are Bear's homemade Valentine's for our party on the 14th. The heart mazes can be found at Michael's.
 
These "pink ladies" were really easy to make and a huge hit with the kids at the play date we took them to. Just take pink wafers, dip them in white almond bark, and stick on candy lips (found at HEB) before chocolate dries. After dry, draw on eyes with black gel icing. So easy and fun! Bear did a few with sprinkles only, which still tasted good. :)
 
We also made donut cookies for a play date we didn't end up going to because Bear is battling yet another cold :(. Praying he feels like himself soon, it's been a rough month and a half of on and off sickness for the little guy.
Betty Crocker donut mix found here (we snagged it at Dollar Tree last week!). This mix is so yummy, they really do taste like donuts!
 
I've been trying to tweak my cookie icing recipe for some time, with quite a few failed attempts along the way. This time was the best result I've gotten so far, so I thought I'd share the recipe. If you have any tips on the perfect icing, I'd love to hear!
 
Donut Cookie Icing:
1 cup powdered sugar
2 teaspoons milk
2 teaspoons light corn syrup
1/4 teaspoon almond extract
 
In a small bowl, stir together powdered sugar and milk until smooth. Beat in corn syrup and almond extract until icing is smooth and glossy. If the consistency is too thick, add small amounts of corn syrup until icing is smooth.
For pink frosting, add 4 drops of red food coloring and stir until blended.
*yields icing for 2 dozen 3 inch cookies
 

Hope you're having the sweetest week!


Saturday, April 26, 2014

Easy Summer Wreath

 It's been a week since Easter and I just noticed this morning that we still had our Easter egg wreath hanging on the front door. A quick trip to Michael's and $15 worth of supplies later, a summer "wreath" was born. Can you tell we're ready for lemonade stands, swim suits, & barbecues? 'Cause we are!
 
Simple. Easy. Sweet. Just the way I like a good craft.
 
As I said before, the supplies cost us $15 because we already had several things needed on hand. I thought it would be a little cheaper, actually, but the silk flowers weren't on sale like I thought. If you find some on sale or have a coupon, you could make this for even less! It also only took me about 10 minutes to make.
 
You'll need:
-large hanging chalkboard (this one was $5 at Michael's)
-lace or wide ribbon
-silk flowers (8-12 individual flowers)
-hot glue gun/glue
-scissors
-chalk
-tin shears

Start by measuring out your lace or ribbon to be a little longer than the already attached twine. Glue the lace/ribbon on both sides of the twine. Make sure it's nice and secure. This step isn't necessary, but it makes the sign a little prettier :).

Using the tin shears, cut each stem about halfway. Leave enough to lay flat on the back of the sign while gluing, about 3 inches from the flower.

Glue the flowers, one at a time, to the back of the sign using a good amount of hot glue. You'll need to bend the floral stems into a 90 degree angle before gluing so they lay flat on the back of the sign and still face forward on the front. Continuing doing this around the sign until all the major "gaps" are filled and to your own liking. I ended up using 9 flowers.


Write a summery message & ta da! You're all done! A fun, fresh way to greet all who enter.
I can't look at ours without singing "Night Moves". Which doesn't upset me at all.

 We're certainly not rushing spring because the past few weeks have been absolutely beautiful in Houston. I just looked so forward to summer every year as a child that I can't seem to shake that laid-back, vacation, late-night-s'mores anticipation. I'm also looking so forward to taking our little Bear to splash in the neighborhood pool!

Are you looking forward to summer, too? 2014 is flying by!
Hope you're having a great weekend!

Friday, April 12, 2013

DIY Crepe Paper Rosette Wreath


Have you ever had one of those heartbreaking moments when you think you came up with the most ingenius idea ever, only to see it floating around on Pinterest two days later? That's exactly what happened with these pretty little paper roses, also seen here on The Idea Room.

I'm a sucker for pretty, inexpensive crafts. If you make something yourself, it should be cost effective (aka cheap), right? If not, then why not save yourself the trouble and just buy whatever it is you're making in a store?

Hello, summer! (in Houston, anyway)
 
I'm proud to say this wreath cost a total of $4 to make (I already had hot glue gun/glue and burlap. Crepe paper rolls are $1 at most places and the wreath was on sale for $1.85 at Michael's). If you remember this project, then you know I'm challenging myself to keep homemade wreaths as inexpensive as possible. Makes Momma happy, Daddy happy, and Baby, well, he doesn't really care (is there milk in that wreath?).
 
 
 Here's how you can make your own:


Tear off a piece of crepe paper several feet long. You'll want to do all different lengths so your roses will vary in size. 

Crinkle up the paper in your hand.

Straighten it out.

Fold paper in half.

Begin rolling from the center out.

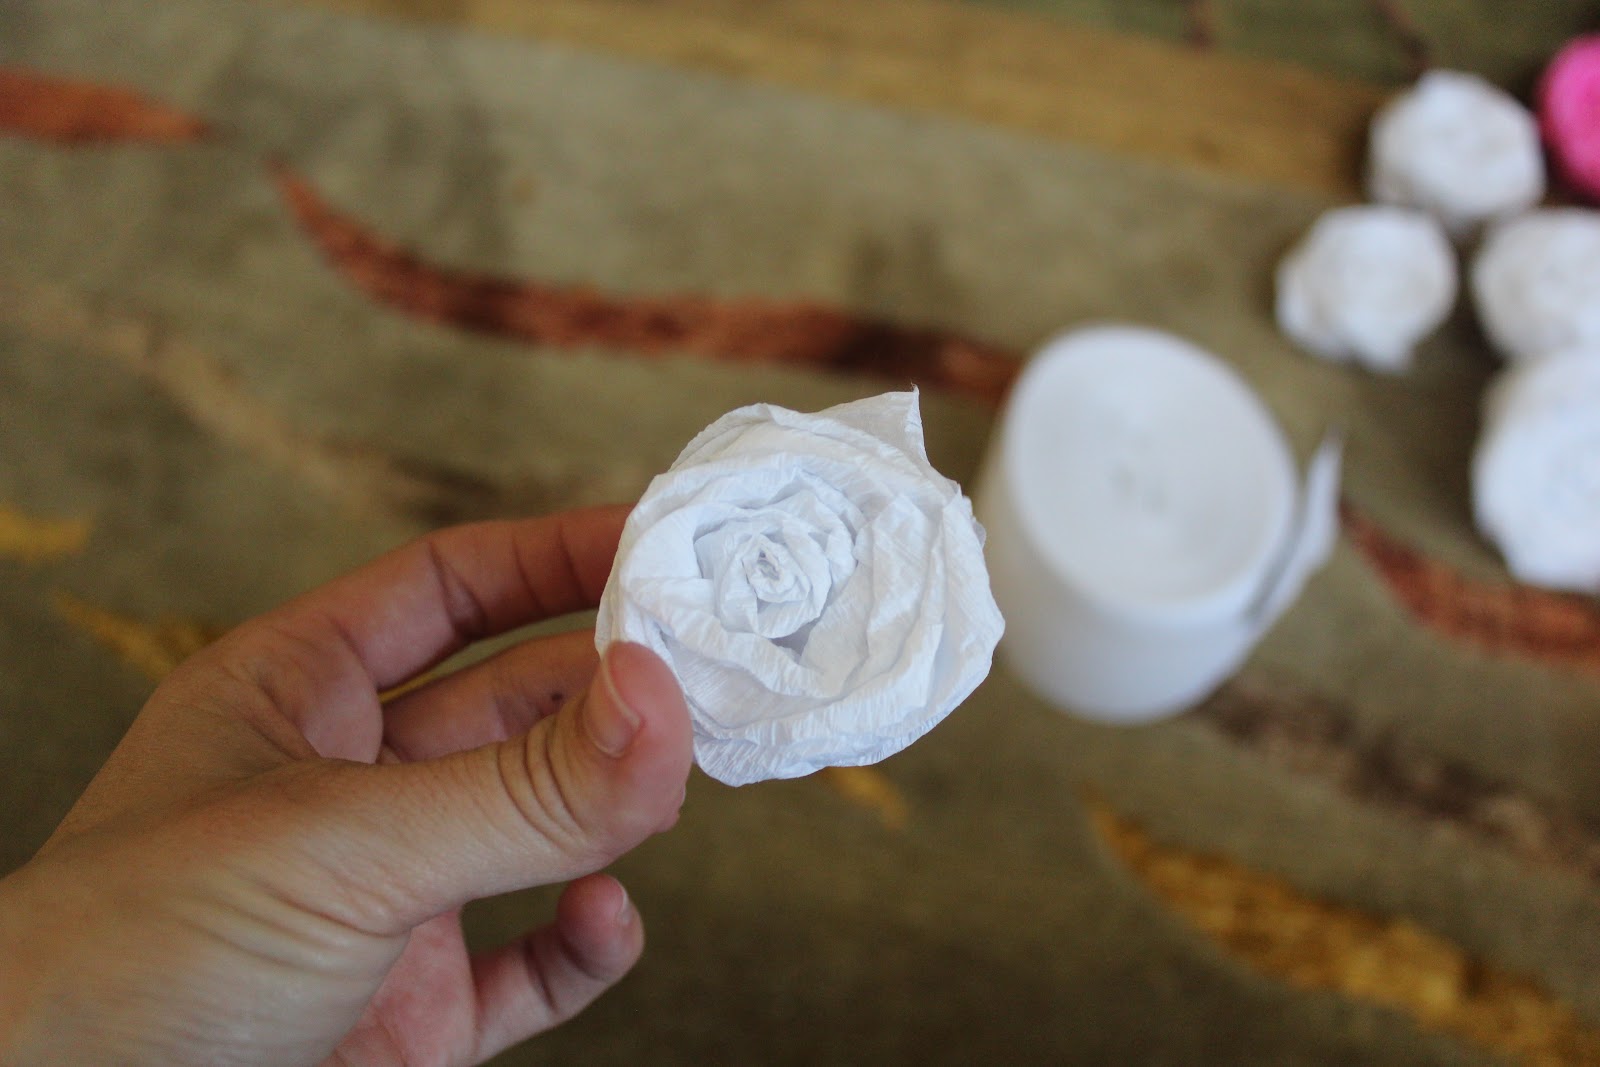
As you roll, twist the paper and add dabs of hot glue every few rolls to secure. There's no real method to this, and no way to mess it up, just make little twists here and there and you'll see what I mean.

Once you reach the end, glue it down and viola! A pretty little rosette. Wasn't that easy?

These are so quick and simple to make, pretty soon you'll be swimming in them! They're versatile, too; you can glue them on tons of different things. I glued some extras onto twigs from our backyard, put them in a vase, and made a fun little arrangement for one of our guest bedrooms.

Back to the wreath making...
Glue rosettes onto wreath; you'll know what looks pretty.

I tied a burlap bow, but you can add any "flair" you'd like. I just love the texture and look of burlap (Zach teased me and told me I could've done a better bow; I told him it's "shabby chic" and not supposed to be perfect).

Finish gluing on rosettes and hang your new wreath up for all to see! Quite inviting, don't you think?
 
 
My two best friends from college are headed down to stay with us this weekend and I'm all kinds of crazy-person-excited. Nana's Fudge Cake is baking in the oven, goodie sacks filled with treats are waiting on the guest beds, and Bear is almost crawling (wild, right?) just in time to show off for his aunties. Plus, it's Master's weekend! Chalking up to be epic. Expect lots of pictures, paired with long-winded stories, on Monday.
 
 
Happy Weekend, y'all!